Step 2.
Now you have identified and located all the pieces in your pack, it’s time to prep the windows.
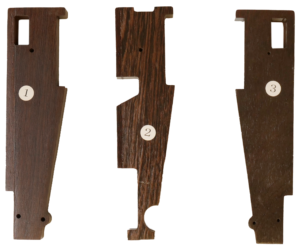
Identify the chassis pieces labelled 1, 2 & 3.
Lay the chassis pieces on the table in ascending order.
Safety first!
Please be careful when using the tools to assemble your toy plane. If you would like to wear protective gloves, ask a Help Desk assistant for a pair or provide your own from home if you are self-facilitating.

Group the window inserts into the chassis
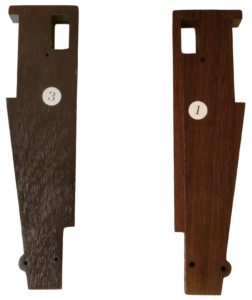
Identify the window inserts and slot them into the rectangular insert with the zigzag pattern facing outwards on chassis pieces 1 and 3.
Please note, the pattern will be facing the opposite side to the stickered side of the chassis.
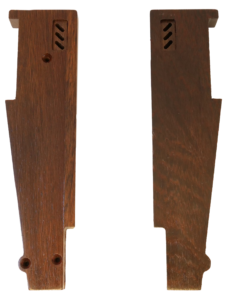
This is how the plane windows should look so far.