Step 3.
Now, group together chassis pieces 1, 2 and 3 ensuring the wheel arch on chassis 2 is facing downward.
Ensure that the front and end of the plane will sit flush. All stickers will be on the inside of the toy and therefore unseen once built.
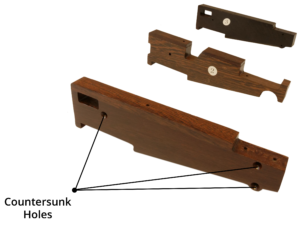
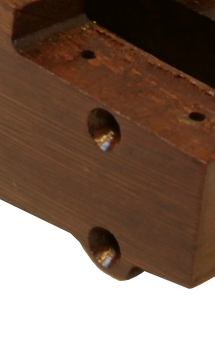
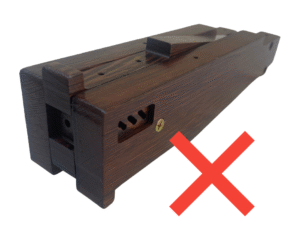
When you are assembling the toy plane, please ensure that the countersunk holes are always left facing outwards (away from the plane and towards the team member building that section of the plane) see image below.
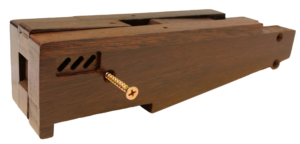
Time to screw chassis pieces 1, 2 and 3 together.
Use 1x ‘L’ screw and the screwdriver to connect chassis pieces 1, 2 and 3 together, at the front side of the plane, beside the window insert. Only screw until snug, don’t apply too much pressure as it may cause the hole to become loose.
You will notice only one side has countersunk holes for the screws.
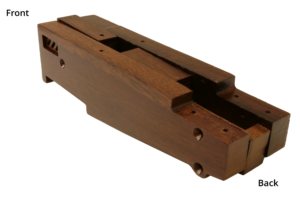
Make sure that chassis pieces 1, 2 and 3 are flush, the wheel arch is situated at the rear of the plane and that the window inserts are at the front.
If chassis 2 is upside down, you will not be able to move to the next stage. The plane should look like the image with the ‘tick’ below.

Make sure to insert ONE screw only at this point to the front of the plane. You will have the opportunity to insert the back screws at a later stage.
Wood is a natural product that can swell or shrink depending on its environment, so take care when screwing in some of the components, as it may be challenging.